Choose your operating system


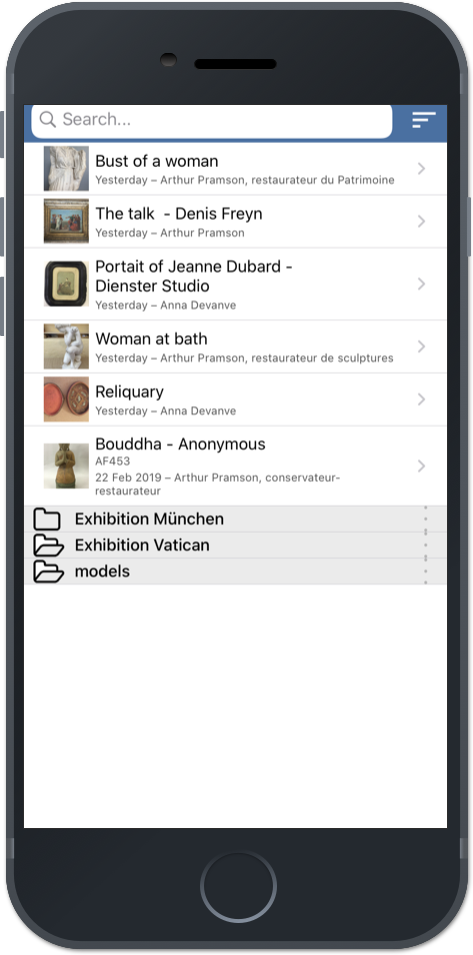
1. Home
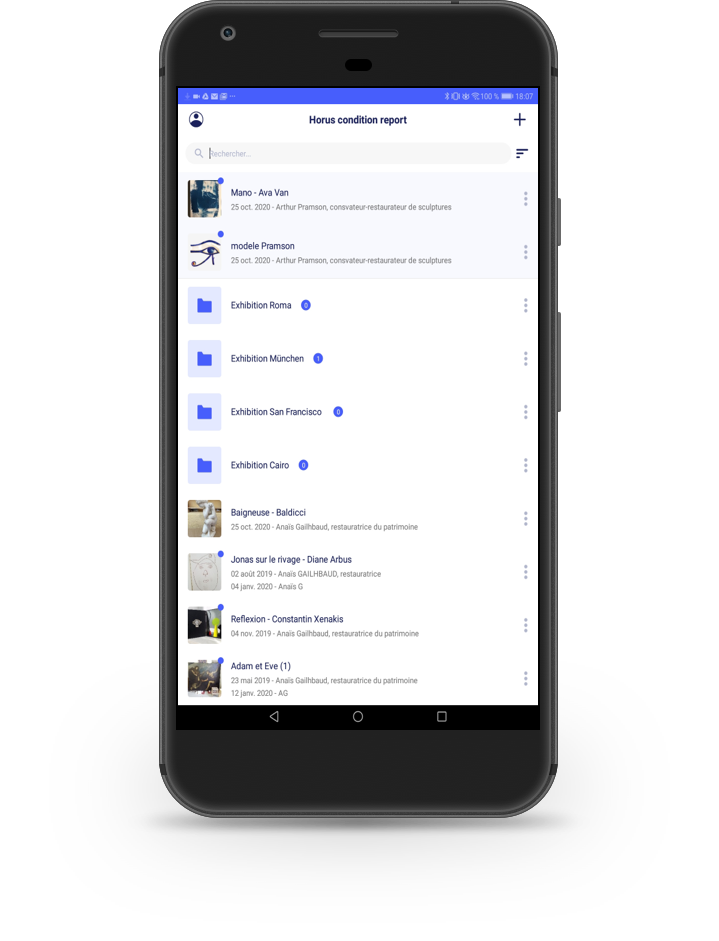
To create a new report press “+” or “new” on the top right. The application archives the reports. From this homepage, you can:-
- complete them if they are not finished,
-
- duplicate them,
-
- send them,
-
- delete them.
2. Useful information for the report
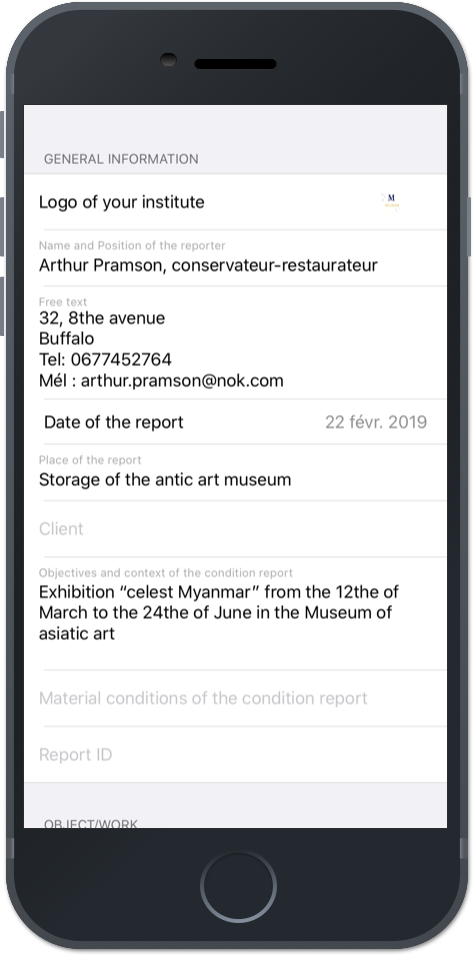
Complete the necessary standard information for your report in the empty text box:-
- your name, position, the logo of your institution,
-
- you have a free text box to enter your address, telephone number, email address or any other information,
-
- the date and place of the report,
-
- the name of the person that has hired you,
-
- You have other fields: “Objectives and context of the report” "Material conditions of the report”
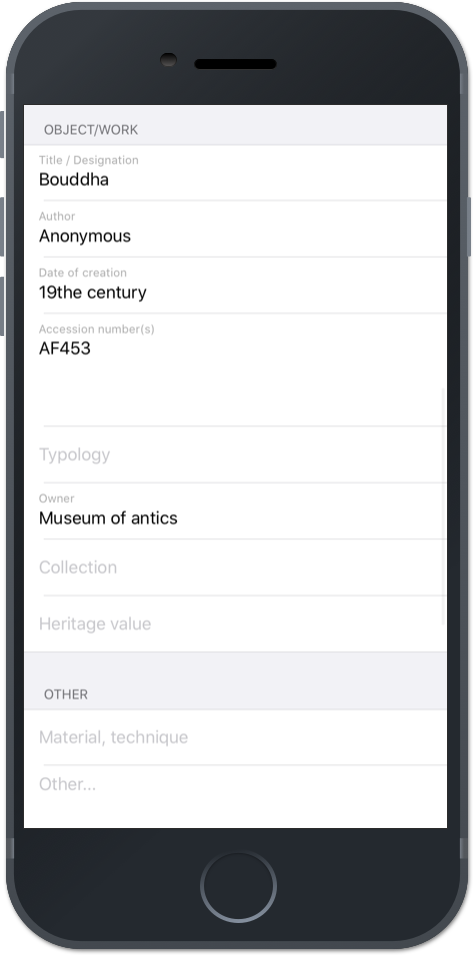
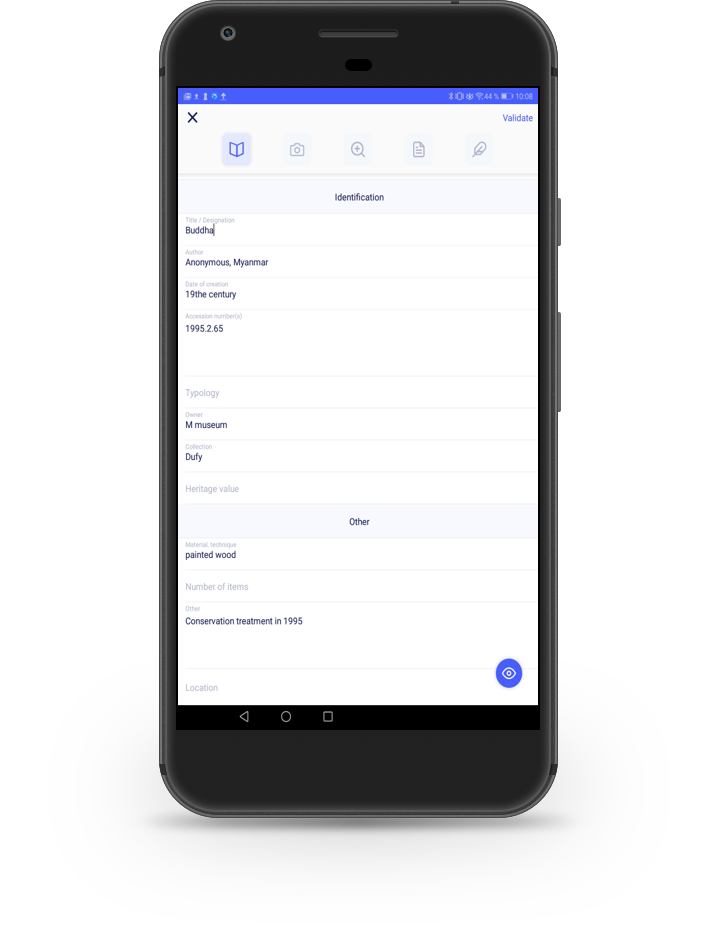
3. Information on the artwork
Complete all that you think useful regarding the work that you are examining:-
- title, author, creation date, the inventory number, typology
-
- the owner, the collection, the heritage value
-
- materials and techniques, a field “other” (for instance: old restoration)
-
- size, weight…
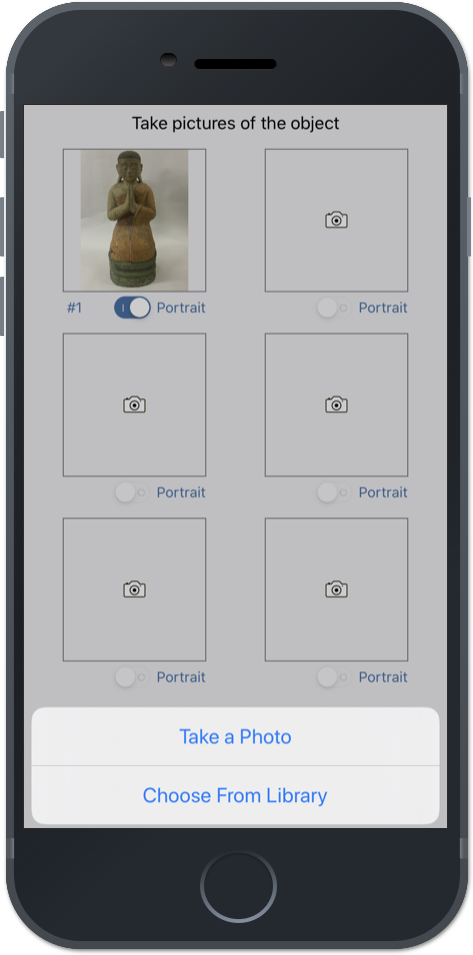
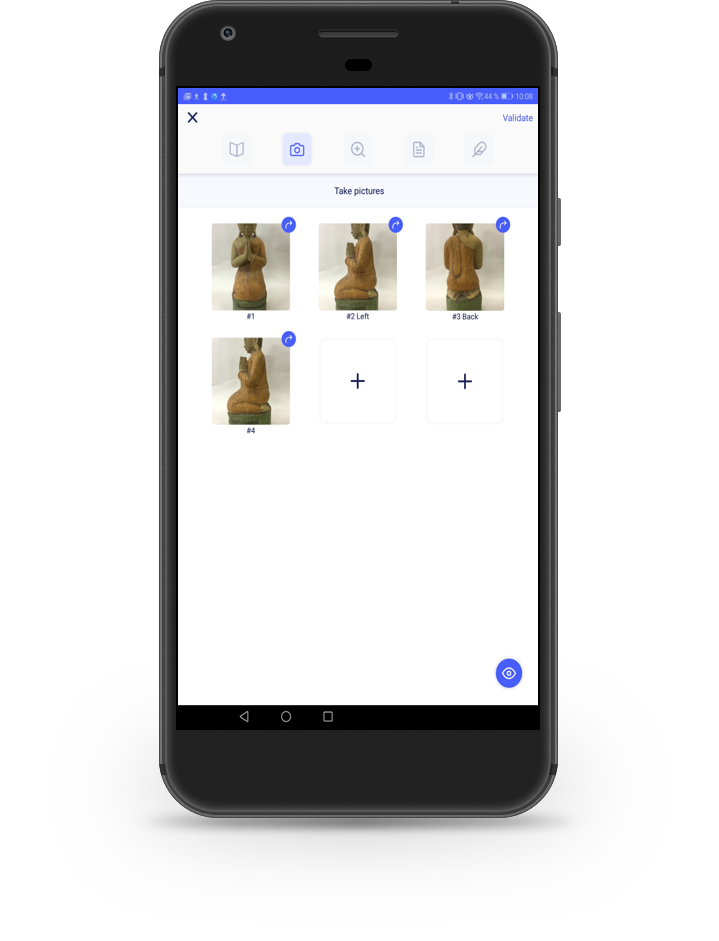
4. Pictures
Insert up to 6 photos or more with the Pro version:-
- import them from the gallery of your device
-
- take pictures of the artwork during the report: in this case, it is recorded in the gallery of the device.
5. Damages
Add damages by pressing “+Add new damages”. With Advanced and Pro version add detail photos.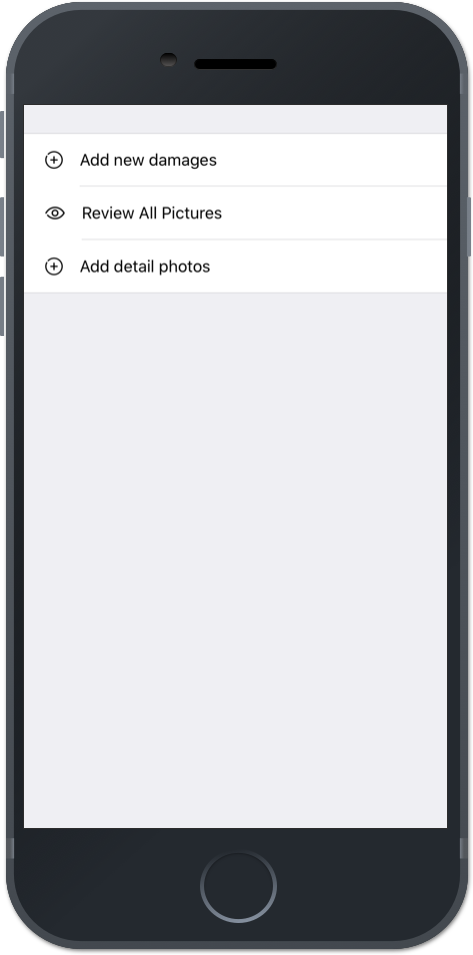
6. Selection of a material
Select a material in the preconceived list. Or create a missing material by pressing “+ New material”. Hide some materials by pressing on (i).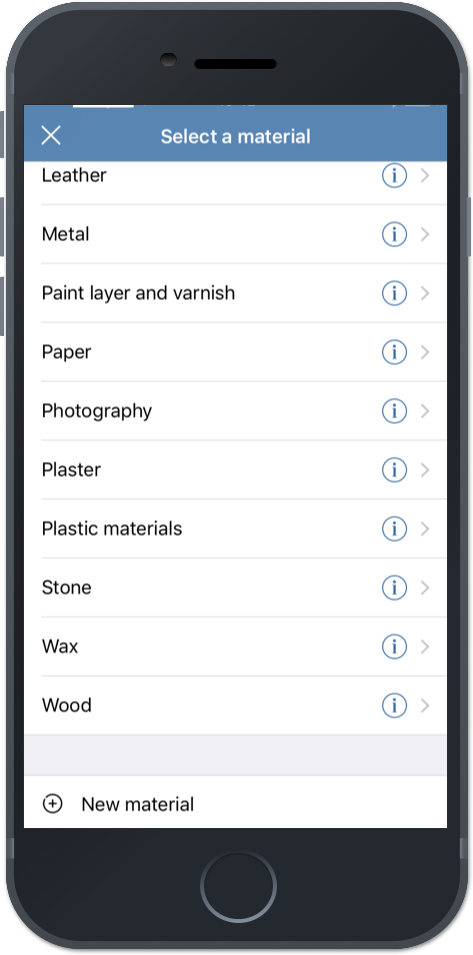
7. Selection of a damage type
Choose a damage type in the preconceived lists. These lists have been established in 6 languages by professionals. Create a damage type that is not in the list by pressing « + New damage ». Define their color by pressing « i ».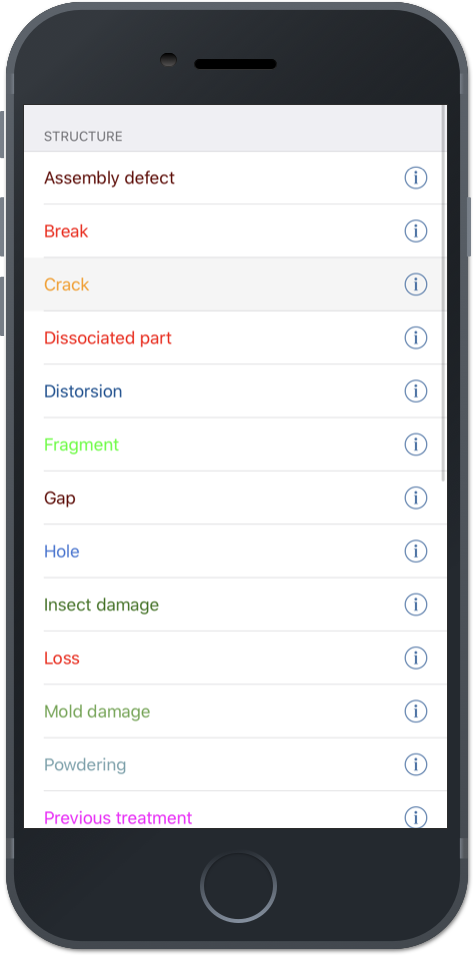
8. Mappings
Annotate damages on pictures with the 5 drawing tools (3 for basic version). To delete an annotation, unselect the drawing tool, press on the annotation and click on the trashcan icon. Then, press “Next” to go to the next picture.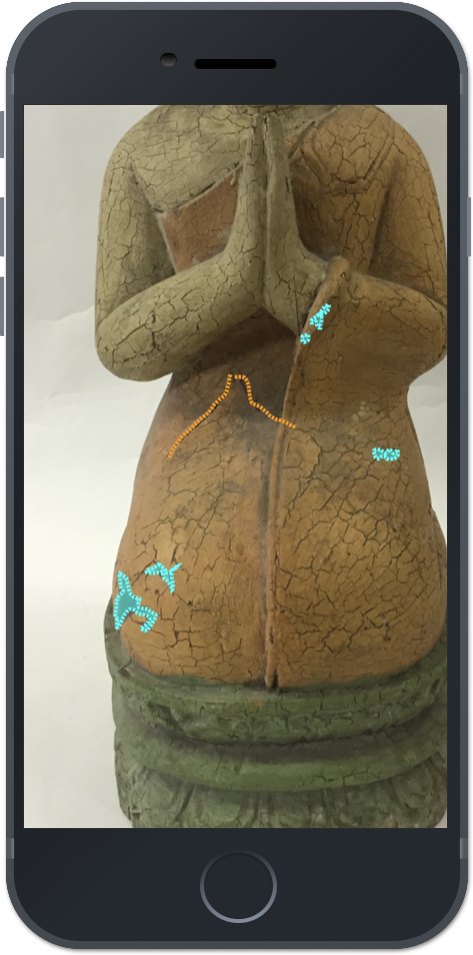
9. Comments and close-ups
Put your comments in the free text box (diagnosis, description, etc.). Close-ups on the annotations are extracted in the highest definition offered by your device. You can choose to include some of them in the final PDF by selecting the boxes. Press “Clear Material: Damage at the bottom of the screen to delete all damages of a type drawn on the pictures.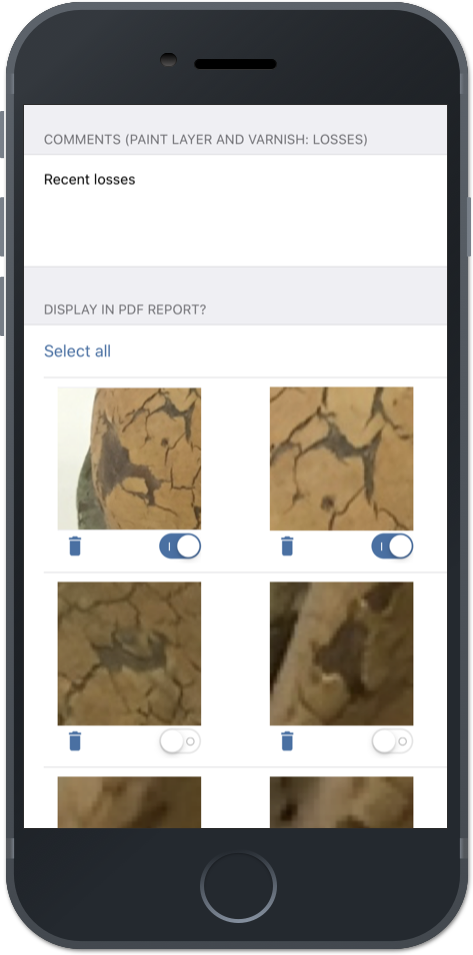
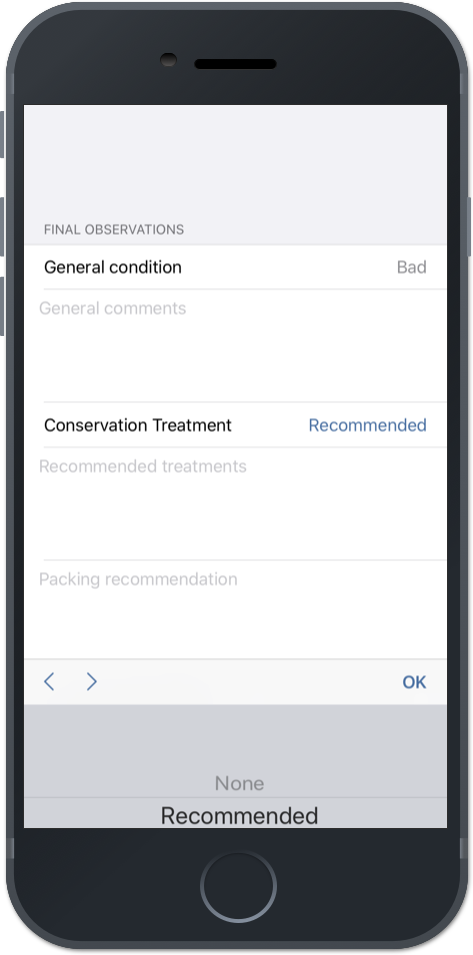
10. Final Observations
-
- Complete the text box “General comments”.
-
- If you have chosen “Recommended” or “Urgent”, you can fill the box “Comments for conservation treatment”.
-
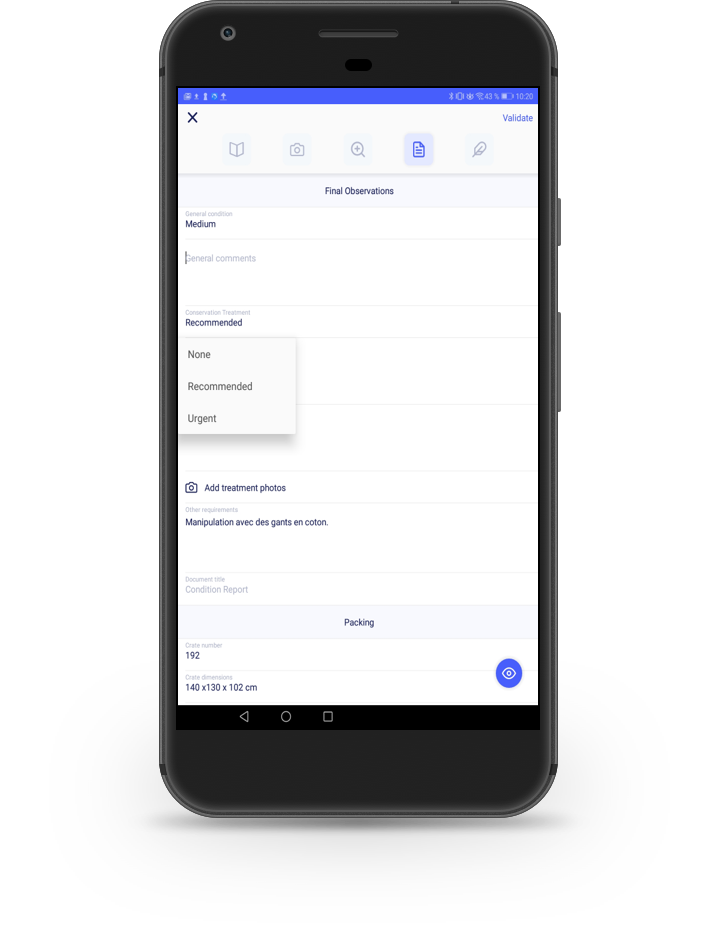
- Select in “Conservation Treatment” one of these three options: “None”, “Recommended”, “Urgent”.
-
- “Packing recommendation”
-
- “Other recommendation”.
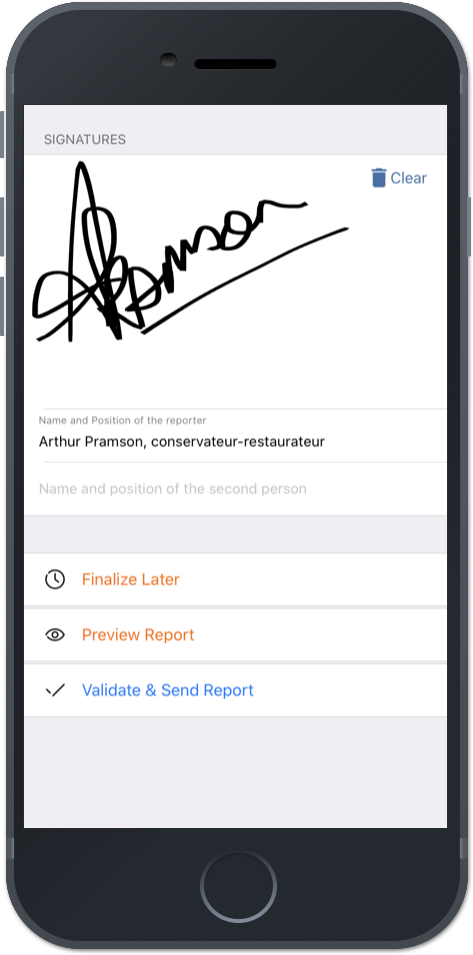
11. Signature, proofreading and validation
Sign directly on the screen! The report can also be signed by a second person. Then make a choice:-
- “Finalize Later” to return to the home page: the report is saved and can be edited later
-
- “Preview Report” enable you to view the document, check information and layout
-
- “Validate and send report” enable you to send the report.
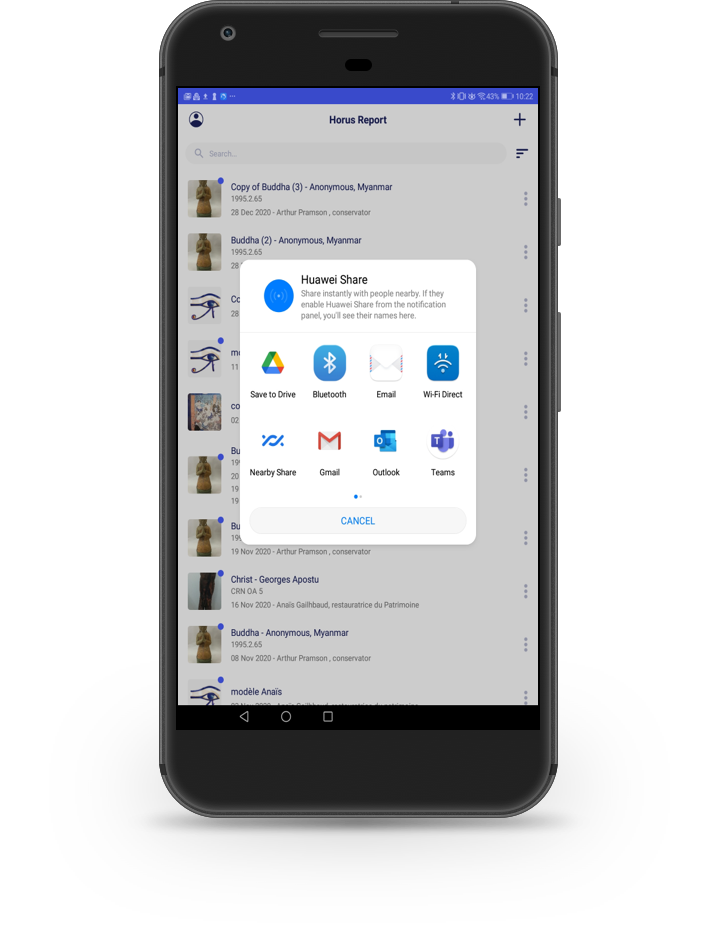
12. Sending report
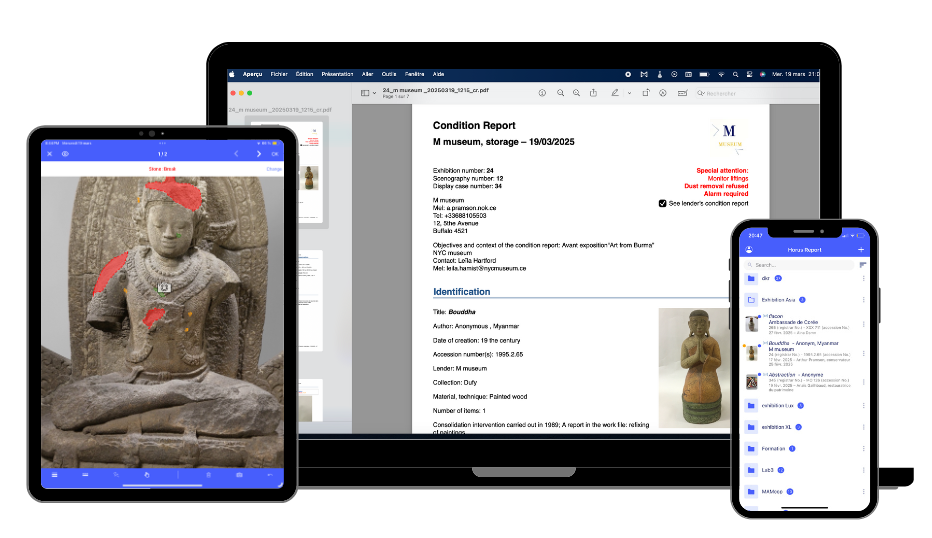
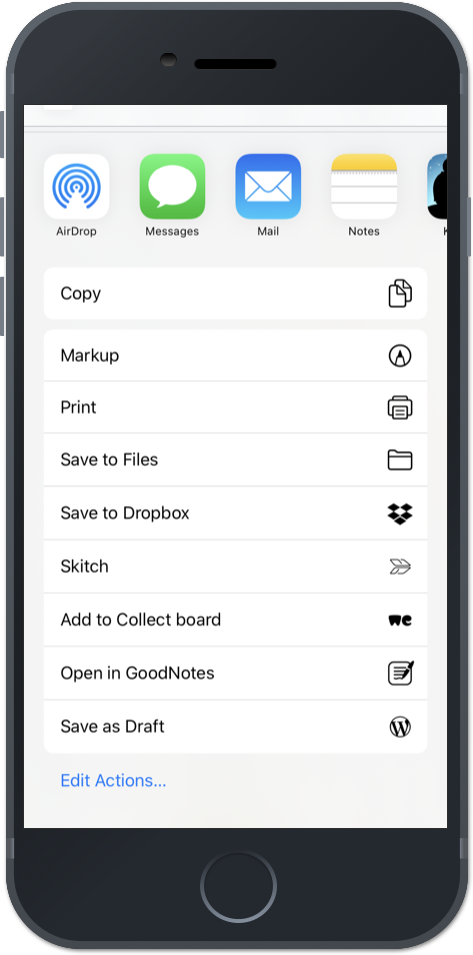
Archive and share your reports in PDF format:-
- by email
-
- on external server as Loud, Dropbox, Google Drive…
-
- to software that can open PDF files (Goodreader, Adobe…)
1. Home
To create a new report press “+” or “new” on the top right. The application archives the reports. From this homepage, you can:-
- complete them if they are not finished,
-
- duplicate them,
-
- send them,
-
- delete them.
2. Useful information for the report
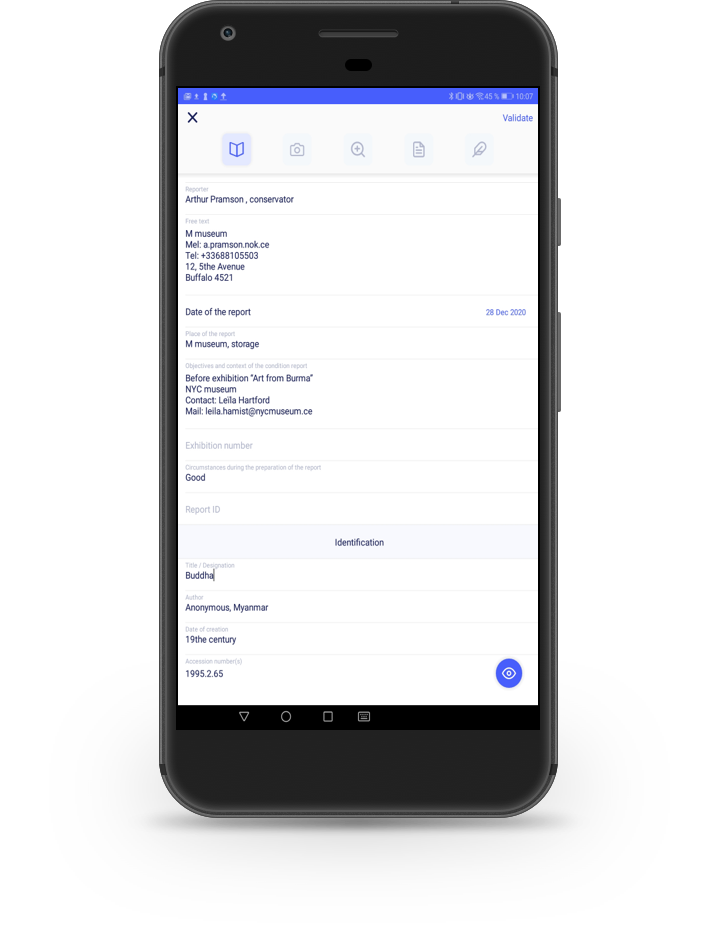
Complete the necessary standard information for your report in the empty text box:-
- your name, position, the logo of your institution,
-
- you have a free text box to enter your address, telephone number, email address or any other information,
-
- the date and place of the report,
-
- the name of the person that has hired you,
-
- You have other fields: “Objectives and context of the report” "Material conditions of the report”
3. Information on the artwork
Complete all that you think useful regarding the work that you are examining:-
- title, author, creation date, the inventory number, typology
-
- the owner, the collection, the heritage value
-
- materials and techniques, a field “other” (for instance: old restoration)
-
- size, weight…
4. Pictures
Insert up to 6 photos or more with the Pro version:-
- import them from the gallery of your device
-
- take pictures of the artwork during the report: in this case, it is recorded in the gallery of the device.
5. Damages
Add damages by pressing “+Add new damages”. With Advanced and Pro version add detail photos.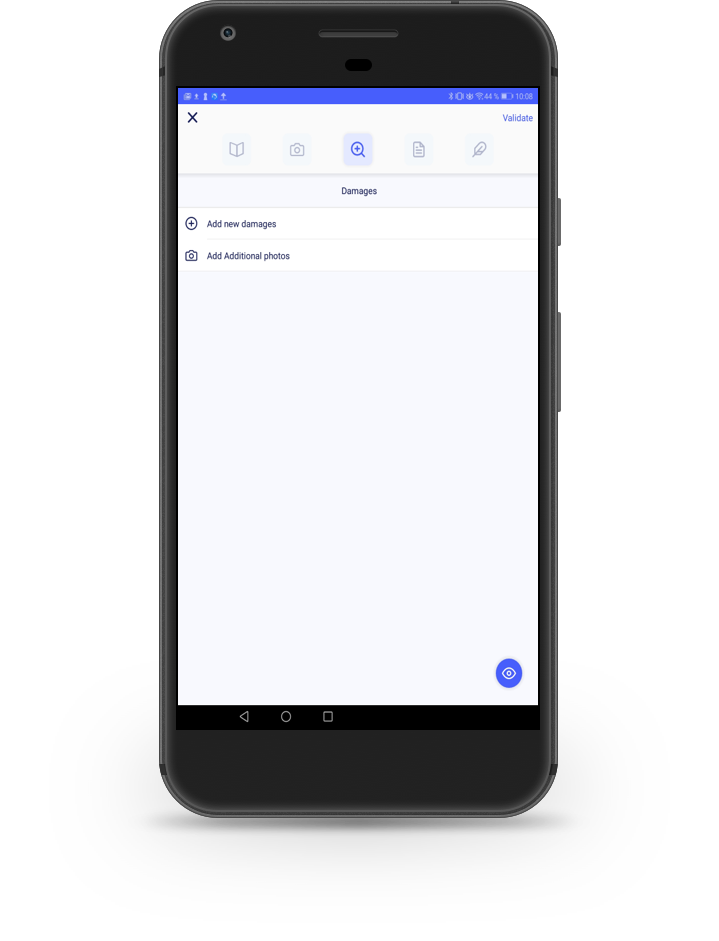
6. Selection of a material
Select a material in the preconceived list. Or create a missing material by pressing “+ New material”. Hide some materials by pressing on (i).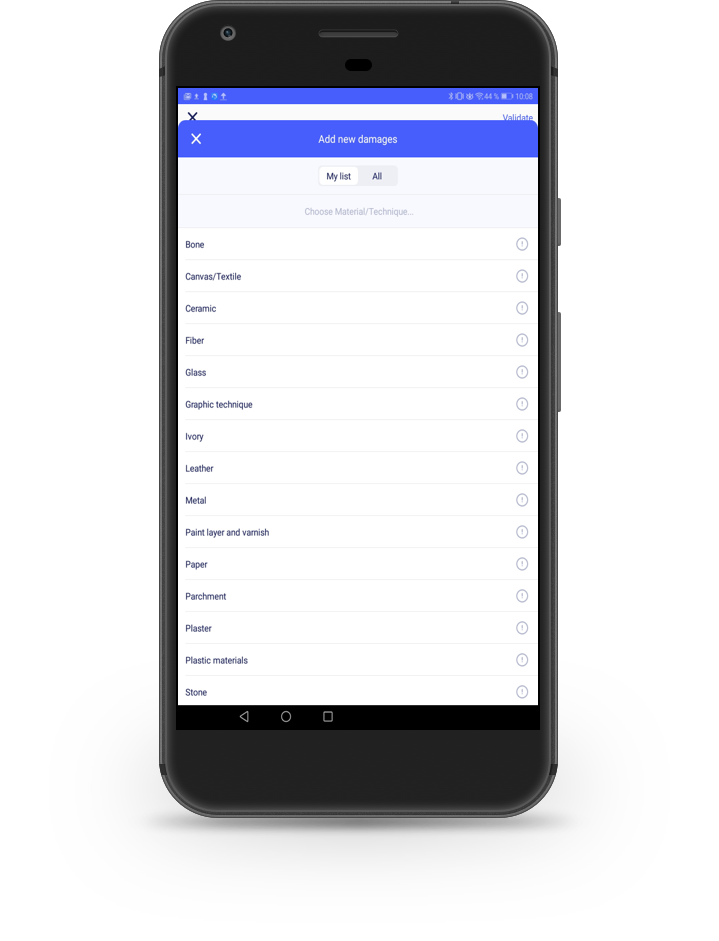
7. Selection of a damage type
Choose a damage type in the preconceived lists. These lists have been established in 6 languages by professionals. Create a damage type that is not in the list by pressing « + New damage ». Define their color by pressing « i ».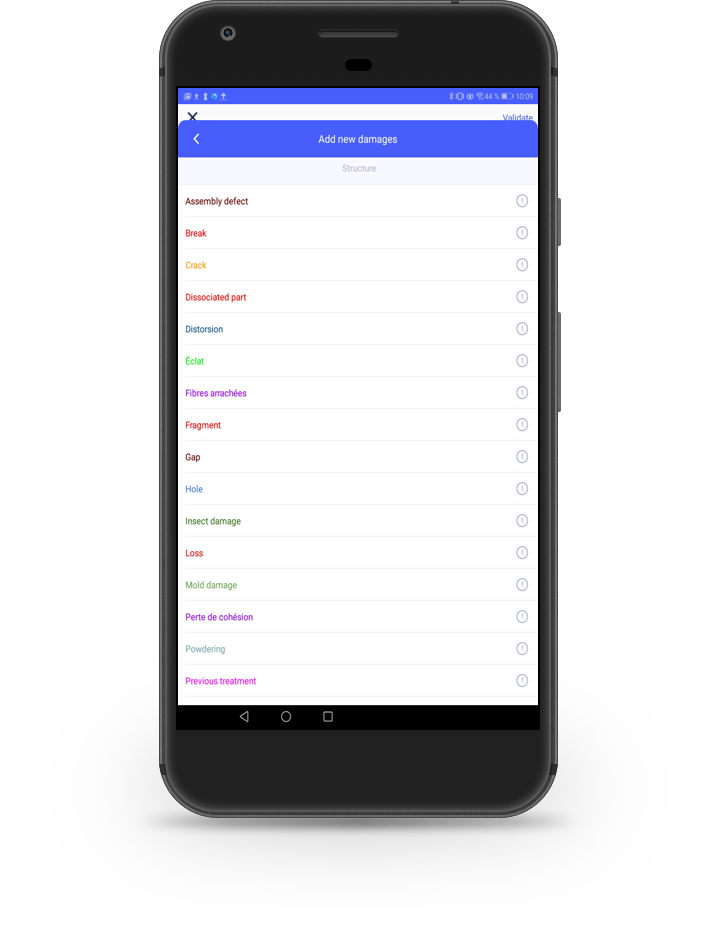
8. Mappings
Annotate damages on pictures with the 5 drawing tools (3 for basic version). To delete an annotation, unselect the drawing tool, press on the annotation and click on the trashcan icon. Then, press “Next” to go to the next picture.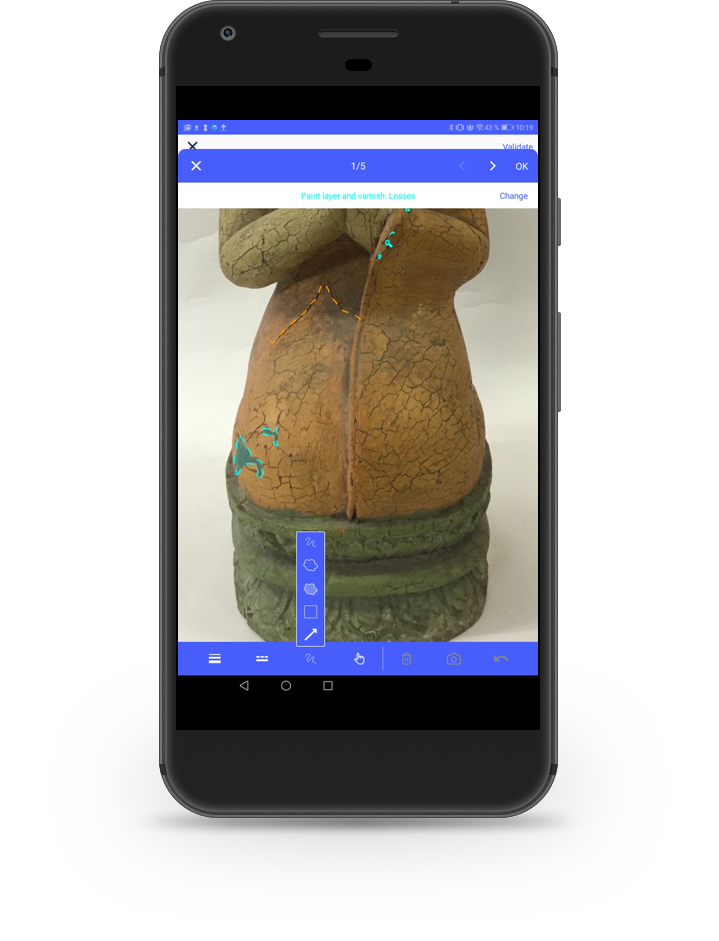
9. Comments and close-ups
Put your comments in the free text box (diagnosis, description, etc.). Close-ups on the annotations are extracted in the highest definition offered by your device. You can choose to include some of them in the final PDF by selecting the boxes. Press “Clear Material: Damage at the bottom of the screen to delete all damages of a type drawn on the pictures.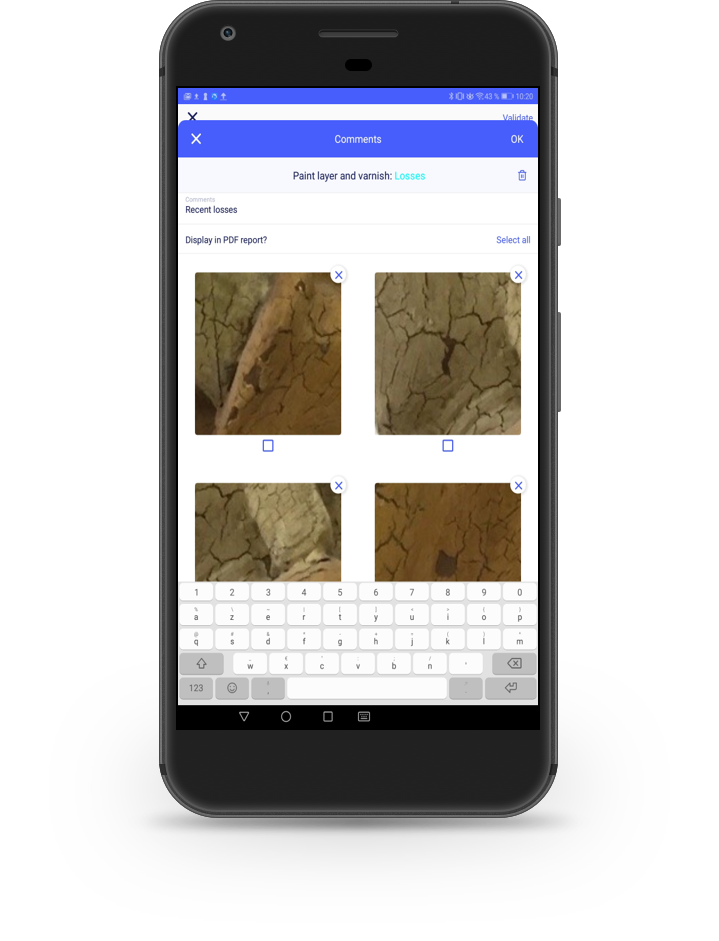
10. Final Observations
-
- Complete the text box “General comments”.
-
- If you have chosen “Recommended” or “Urgent”, you can fill the box “Comments for conservation treatment”.
-
- Select in “Conservation Treatment” one of these three options: “None”, “Recommended”, “Urgent”.
-
- “Packing recommendation”
-
- “Other recommendation”.
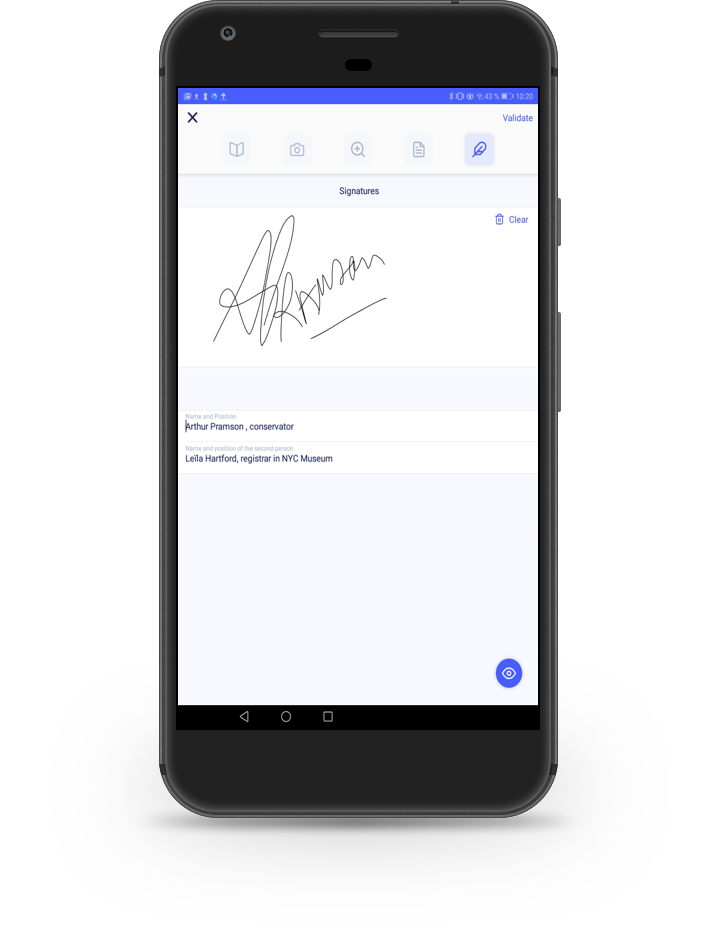
11. Signature, proofreading and validation
Sign directly on the screen! The report can also be signed by a second person. Then make a choice:-
- “Finalize Later” to return to the home page: the report is saved and can be edited later
-
- “Preview Report” enable you to view the document, check information and layout
-
- “Validate and send report” enable you to send the report.
12. Sending report
Archive and share your reports in PDF format:-
- by email
-
- on external server as Loud, Dropbox, Google Drive…
-
- to software that can open PDF files (Goodreader, Adobe…)
